SSH into a Session
Step 0: Create an SSH key
Create an SSH key from the computer you'd like to connect from (skip this step if you already have a key)
# make the ssh key (if you don't have one)
ssh-keygen -b 2048 -t rsa -f ~/.ssh/grid_ssh_creds -q -N ""
Step 1: Add the SSH key
Here we use the ssh-agent to manage the keys and will add them to Grid.
# add the key to the ssh-agent (to avoid having to explicitly state key on each connection)
# to start the agent, run the following
eval $(ssh-agent)
# then add the key
ssh-add  ~/.ssh/grid_ssh_creds

# add the keys to grid
grid ssh-keys add key_1 ~/.ssh/grid_ssh_creds.pub
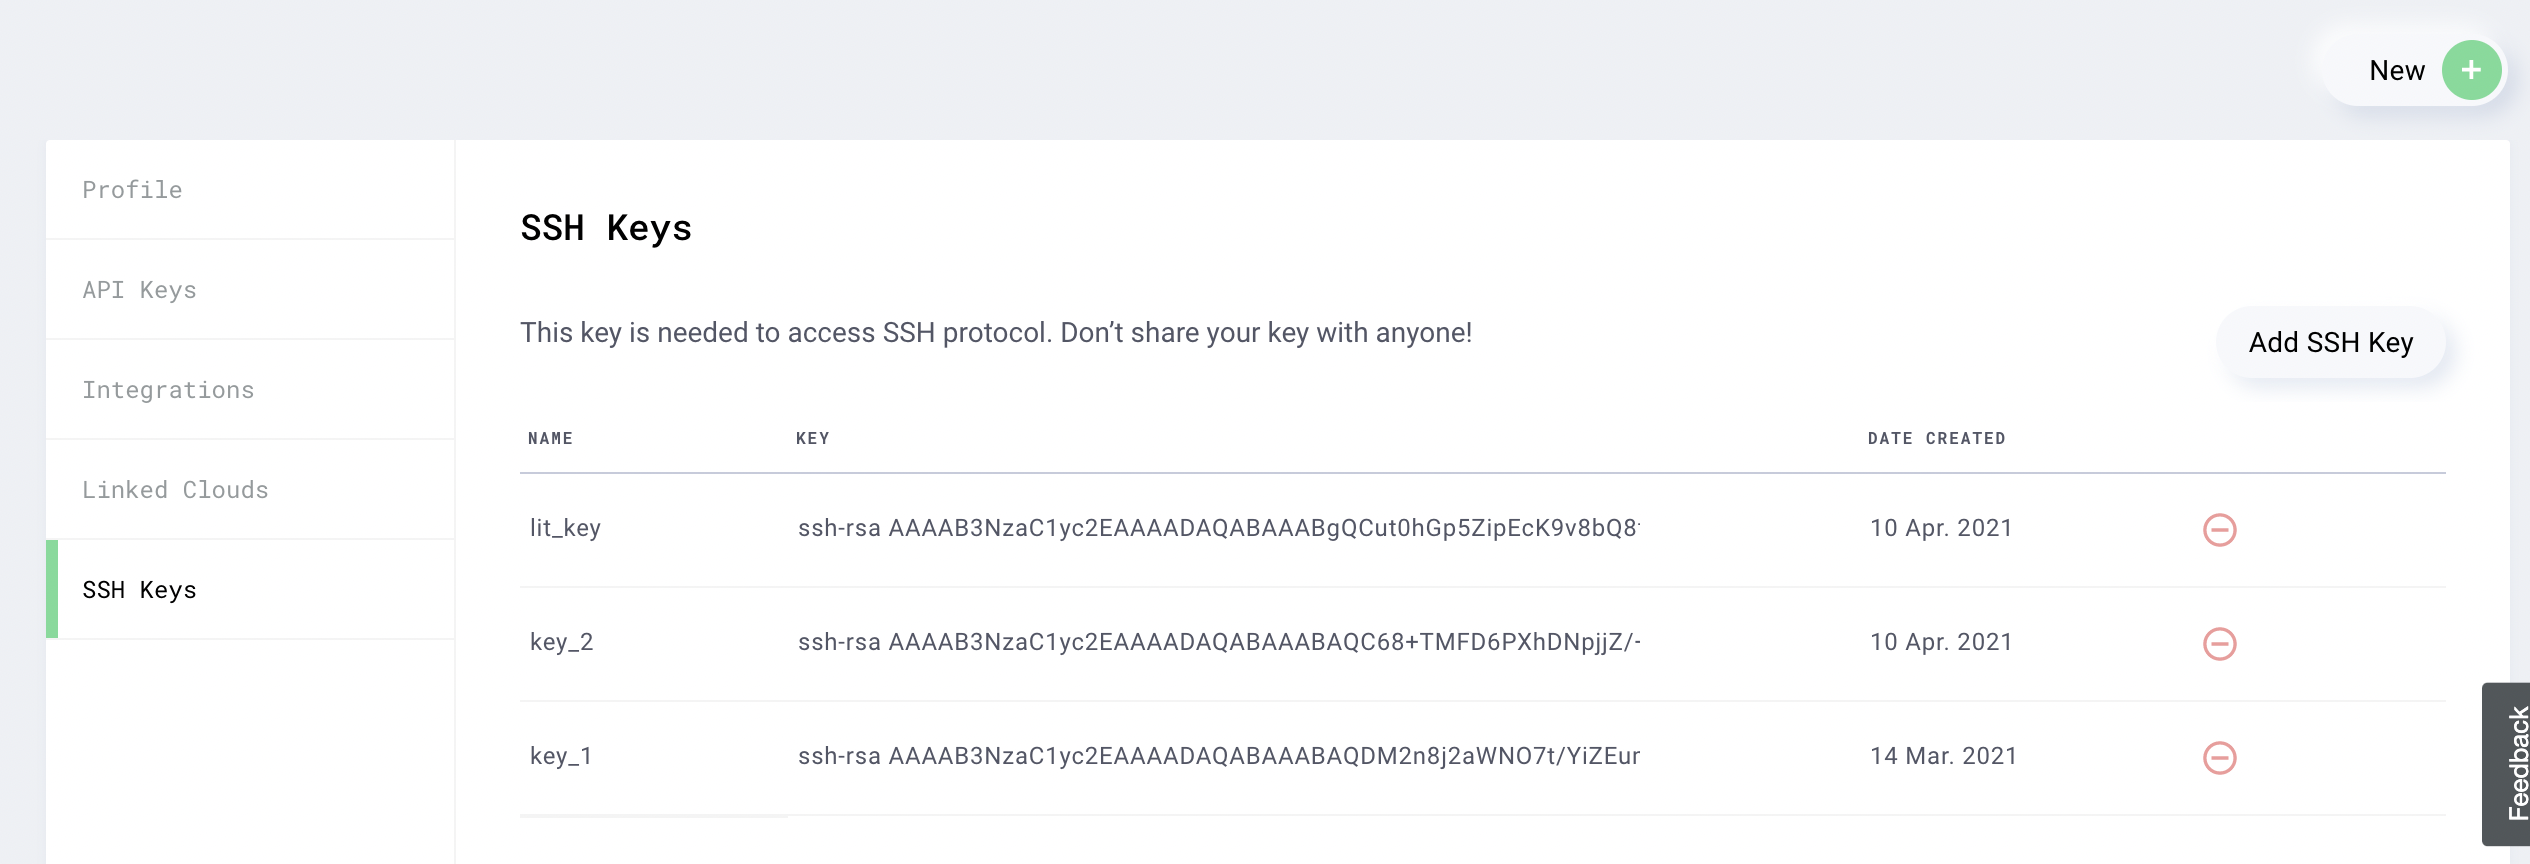
If you go to Grid settings, you'll see SSH keys you've added to Grid
Step 2: Launch the session
Use the CLI or UI to create and launch a session
grid session create --instance_type 2_m60_8gb --name happy-owl-123
Step 3: Login to the interactive session
grid session ssh happy-owl-123
After grid session ssh, you can also use direct ssh commands, for example to port forward remote or local ports,
as well as scp and sftp if needed to transfer any files.
note
If prompted for a password while attempting to connect to a Session:
- Create an SSH Key
- Add the SSH key to Grid.
- Make sure that ~/.ssh/config file doesn't have a rule that conflicts with Gridai settings
- Make sure that the below line is at the top of the ~/.ssh/config file.
note
You can clone any Github repositories into a Session using the HTTPS cloning method (SSH method of cloning will not work).